概览:
SSH端口转发
SSH 端口转发是 SSH 提供的一种机制,通过 Server 和 Client 之间的加密连接中继其它端口的流量。因为连接是加密的,所以对于传输使用未加密协议(如IMAP、VNC或IRC)的信息非常有用。
网络拓补图

端口转发分类
- 本地端口转发
本地端口转发的作用是把 Client 的某个端口的流量通过 SSH 连接转发到 Server ,如图1所示。
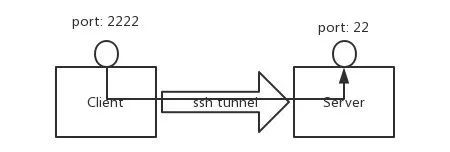
1 | 命令格式如下: |
- 远程端口转发
与本地端口转发相对应的是远程端口转发,其作用是把 Server 的某个端口的流量通过 SSH 连接转发到 Client ,如图2所示。
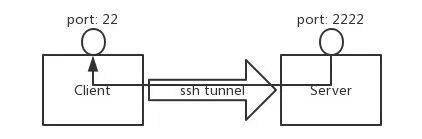
1 | 命令格式如下: |
- 动态端口转发
另外除了本地端口转发和远程端口转发外,还有一个更方便的动态端口转发。与本地端口转发和远程端口转发把流量转发到某个固定主机的固定端口不同,动态端口转发是根据数据包的目的IP和目的端口实现动态转发的,工作机制类似于代理,如图3所示。
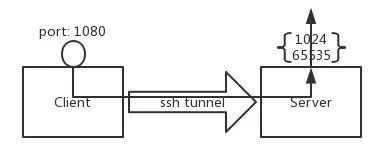
1 | 命令格式如下: |
实践
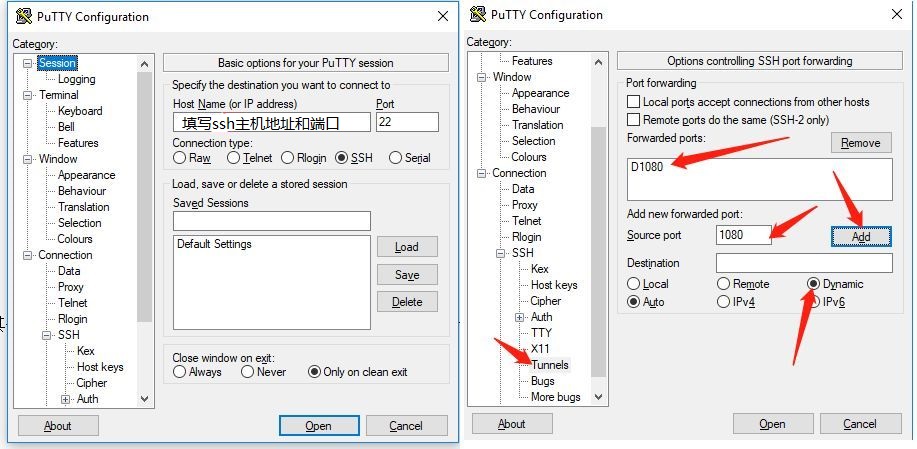
- Command Test
1 | ssh -gD 1080 user@ip |
以windows和putty为例。
配置好点 open ,输入账号密码登陆即可。现在一个简单的代理服务已经运行起来了。接下来是浏览器的配置,这里以 Chrome 为例,配置如图6所示。
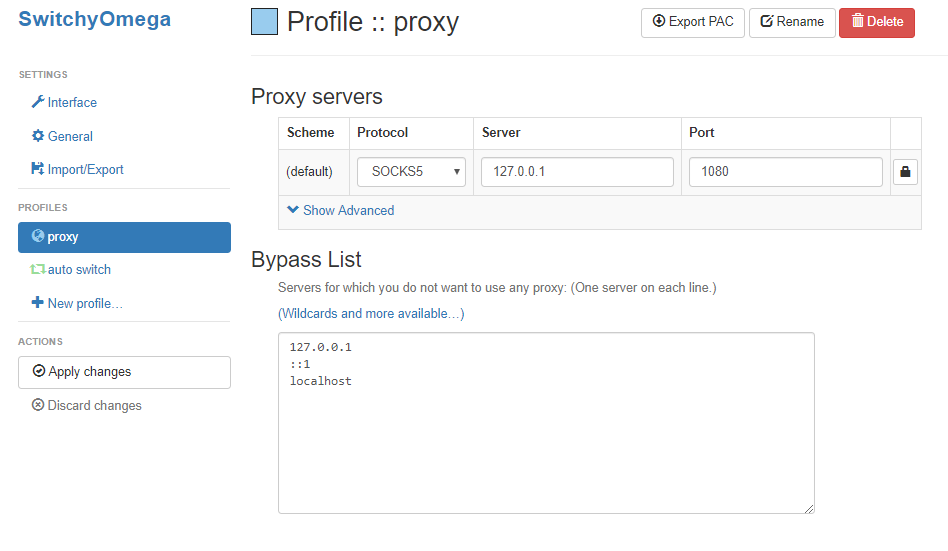
这里我用到了一个很好用的 Chrome 插件 “SwitchyOmega”,用于设置浏览器的代理。用其他代理插件或 Windows 自带的代理设置也是同样的配置:
1 | protocol:socks5 |
X11 forwarding
multipass —x11–> Mac OSX
Docker 也可以,只是我习惯用multipass。
Multipass
Launch an instance : Mine: multipass launch --name primary -c 2 -d 50G -m 2G lts
See your instances. multipass list
1 | Name State IPv4 Image |
into the instances:
1 | export DISPLAY=xx.xx.xx.xx:0.0 |
(replace xx.xx.xx.xx with the IP address obtained above).
To test the setting, we can run in the host some simple program:
1 | sudo apt install x11-apps |
wait xquartz start successful.
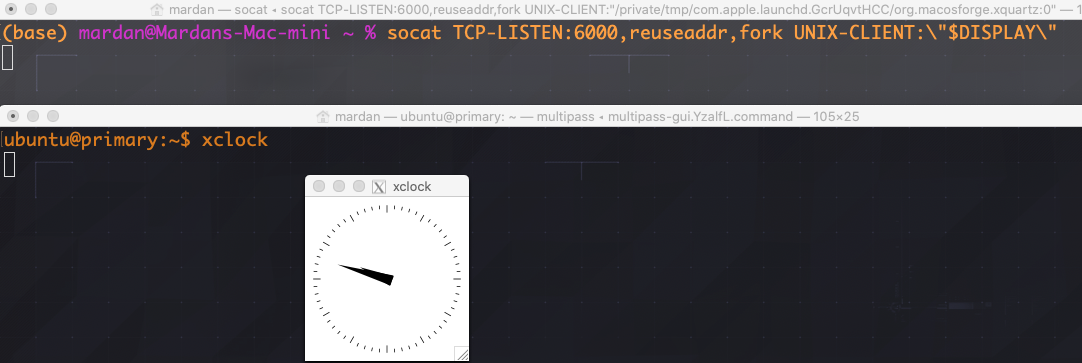
1 | xlogo & # or xclock |
Mac OSX:
- install xquartz. You can also install xquartz using homebrew by running
brew cask install xquartz - install socat
brew install socat
Note, you will have to log out and log back in to your machine once you have installed xquartz. This is so the X window system is reloaded.
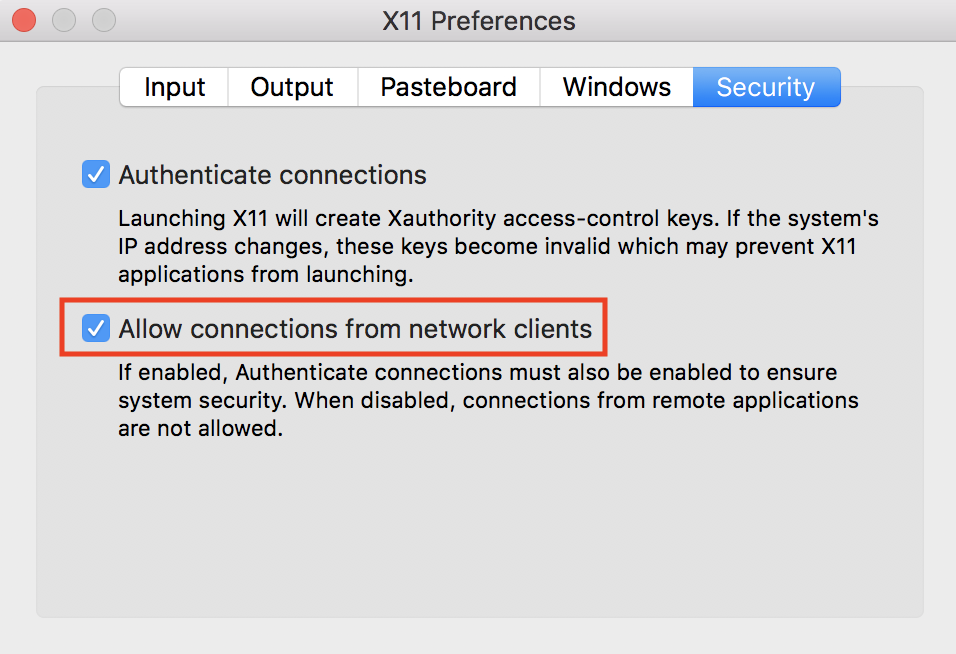
Once you have installed all the prerequisites you need to allow connections from network clients to xquartz. Here is how you do that. First run the following command to open xquart so you can configure it:
1 | open -a xquartz |
Click on Security tab in preferences and check the “Allow connections” box:
Next, you need to create a TCP proxy using socat which will stream X Window data into xquart. Before you start the proxy you need to make sure that there is no process listening in port 6000. The following command should not return any results:
1 | lsof -i TCP:6000 |
Now you can start a local proxy which will proxy the X Window traffic into xquartz which acts a your local X server:
1 | socat TCP-LISTEN:6000,reuseaddr,fork UNIX-CLIENT:\"$DISPLAY\" |