概览:
环境
IDEA启动

New 项目
Maven
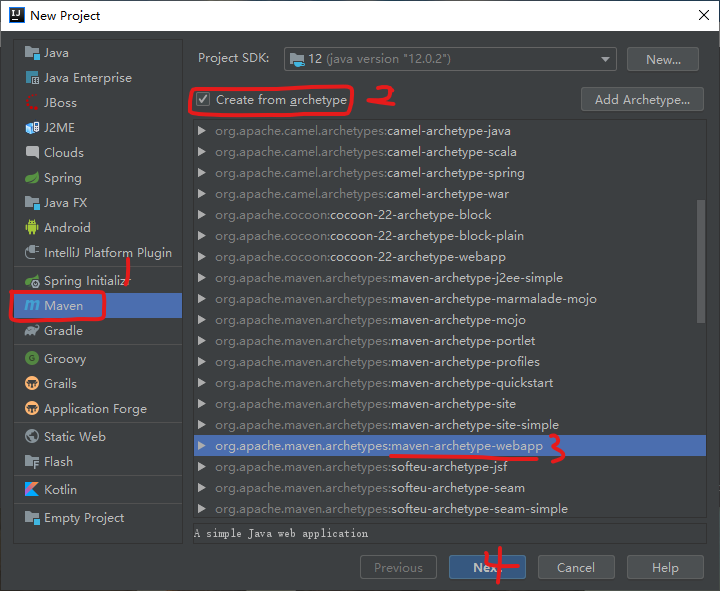
Create New Project ->之后如图,注意,一定要选择maven-archetype-webapp,是以maven开头的。之后Next.
project info
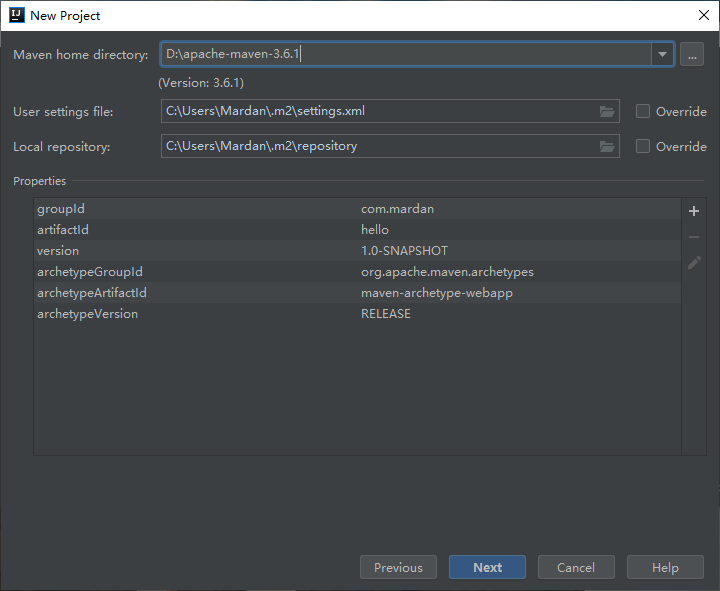
填写项目GroupId,ArtifactId,Version。之后Next。
1
2
3
| GroupId com.mardan #一般写com.XXX.XXX
ArtifactId hello # 项目名称,建议与自始至终保持一个。
Version 1.0-SNAPSHOT # 默认1.0-SNAPSHOT
|
之后选择Maven,建议使用最新版,以3.6.1为例。再Next。
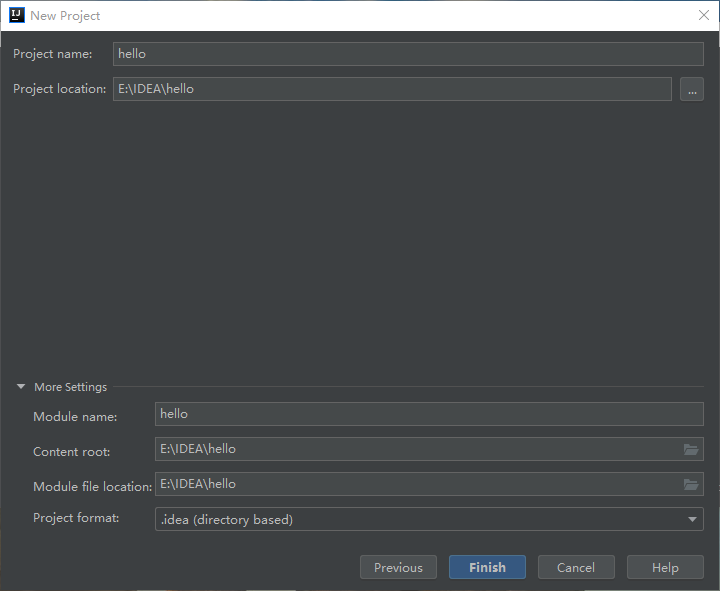
之后选择项目路径,再Next。项目名称建议与前面的ArtifactId保持一致。
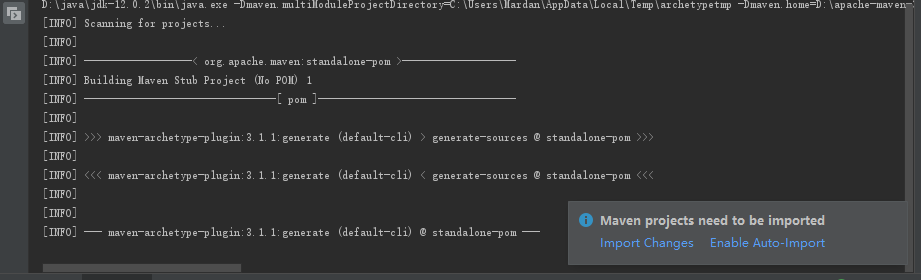
IDEA正在自动下载依赖,右下角可以选择Enable Auto-Import
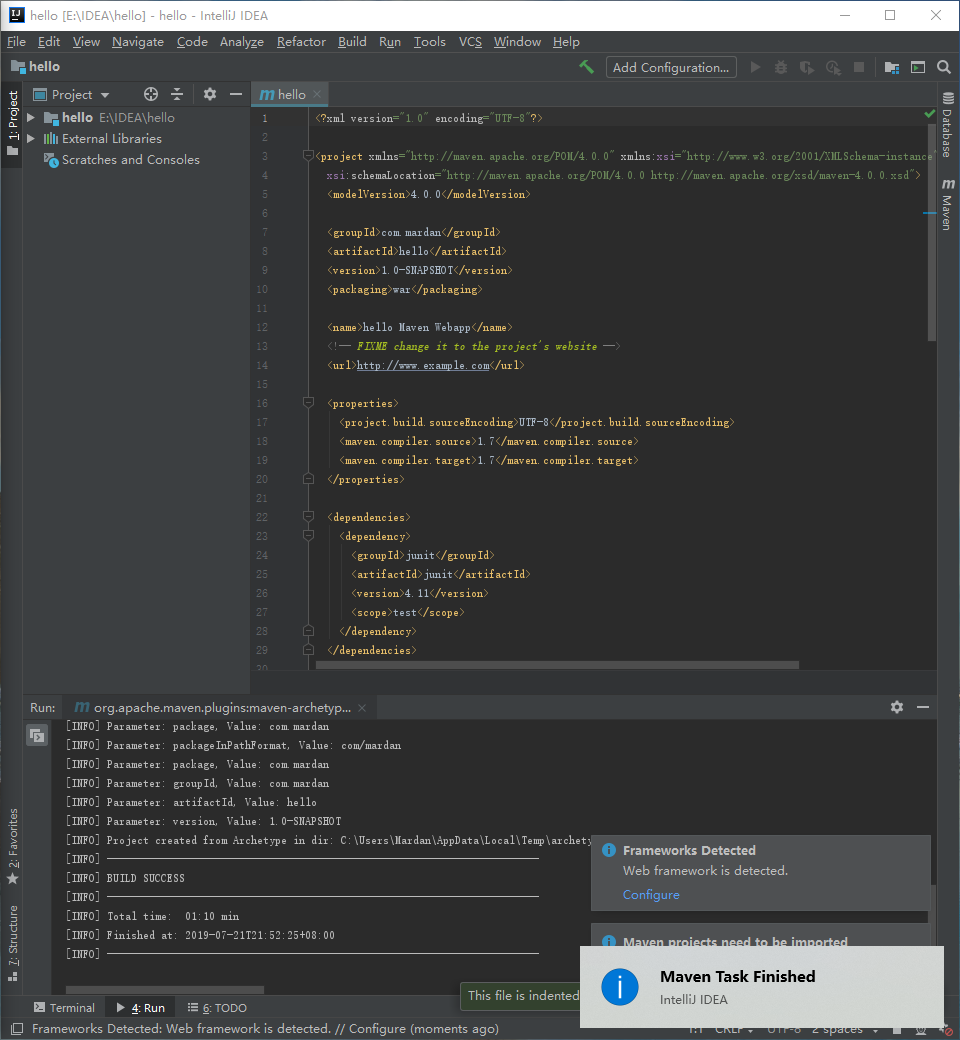
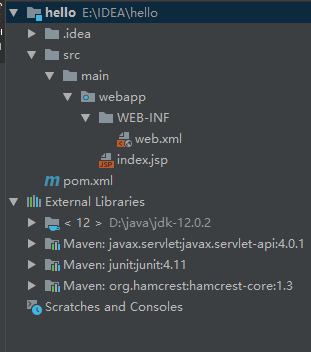
可以在IDEA左边的小树林里看看现在项目的资源。
编写 hello world
可以看到WebApp已经存在,现在需要配置下。
pom.xml
添加依赖,maven仓库。可以搜索找到以下信息,并添加之。添加后Ctrl+S保存,IDEA后台就会自动下载依赖。
1
2
3
4
5
6
| <dependency>
<groupId>javax.servlet</groupId>
<artifactId>javax.servlet-api</artifactId>
<version>4.0.1</version>
<scope>provided</scope>
</dependency>
|
pom.xml全文
1
2
3
4
5
6
7
8
9
10
11
12
13
14
15
16
17
18
19
20
21
22
23
24
25
26
27
28
29
30
31
32
33
34
35
36
37
38
39
40
41
42
43
44
45
46
47
48
49
50
51
52
53
54
55
56
57
58
59
60
61
62
63
64
65
66
67
68
69
70
71
72
| <?xml version="1.0" encoding="UTF-8"?>
<project xmlns="http://maven.apache.org/POM/4.0.0" xmlns:xsi="http://www.w3.org/2001/XMLSchema-instance"
xsi:schemaLocation="http://maven.apache.org/POM/4.0.0 http://maven.apache.org/xsd/maven-4.0.0.xsd">
<modelVersion>4.0.0</modelVersion>
<groupId>com.mardan</groupId>
<artifactId>hello</artifactId>
<version>1.0-SNAPSHOT</version>
<packaging>war</packaging>
<name>hello Maven Webapp</name>
<url>http://www.example.com</url>
<properties>
<project.build.sourceEncoding>UTF-8</project.build.sourceEncoding>
<maven.compiler.source>1.7</maven.compiler.source>
<maven.compiler.target>1.7</maven.compiler.target>
</properties>
<dependencies>
<dependency>
<groupId>junit</groupId>
<artifactId>junit</artifactId>
<version>4.11</version>
<scope>test</scope>
</dependency>
<dependency>
     <groupId>javax.servlet</groupId>
     <artifactId>javax.servlet-api</artifactId>
     <version>4.0.1</version>
     <scope>provided</scope>
</dependency>
</dependencies>
<build>
<finalName>hello</finalName>
<pluginManagement>
<plugins>
<plugin>
<artifactId>maven-clean-plugin</artifactId>
<version>3.1.0</version>
</plugin>
<plugin>
<artifactId>maven-resources-plugin</artifactId>
<version>3.0.2</version>
</plugin>
<plugin>
<artifactId>maven-compiler-plugin</artifactId>
<version>3.8.0</version>
</plugin>
<plugin>
<artifactId>maven-surefire-plugin</artifactId>
<version>2.22.1</version>
</plugin>
<plugin>
<artifactId>maven-war-plugin</artifactId>
<version>3.2.2</version>
</plugin>
<plugin>
<artifactId>maven-install-plugin</artifactId>
<version>2.5.2</version>
</plugin>
<plugin>
<artifactId>maven-deploy-plugin</artifactId>
<version>2.8.2</version>
</plugin>
</plugins>
</pluginManagement>
</build>
</project>
|
添加Servlet类
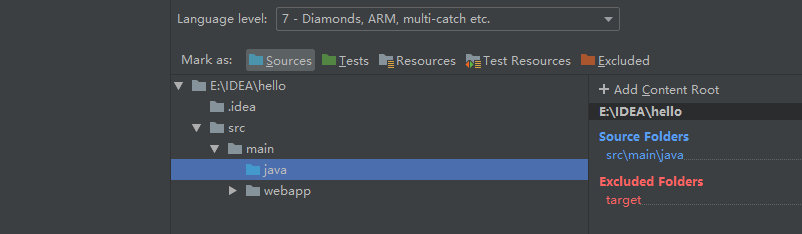
IDEA菜单 -> File -> Project Structure -> Project Settings -> Modules
src\main文件夹中新建一个文件夹,取名为java:
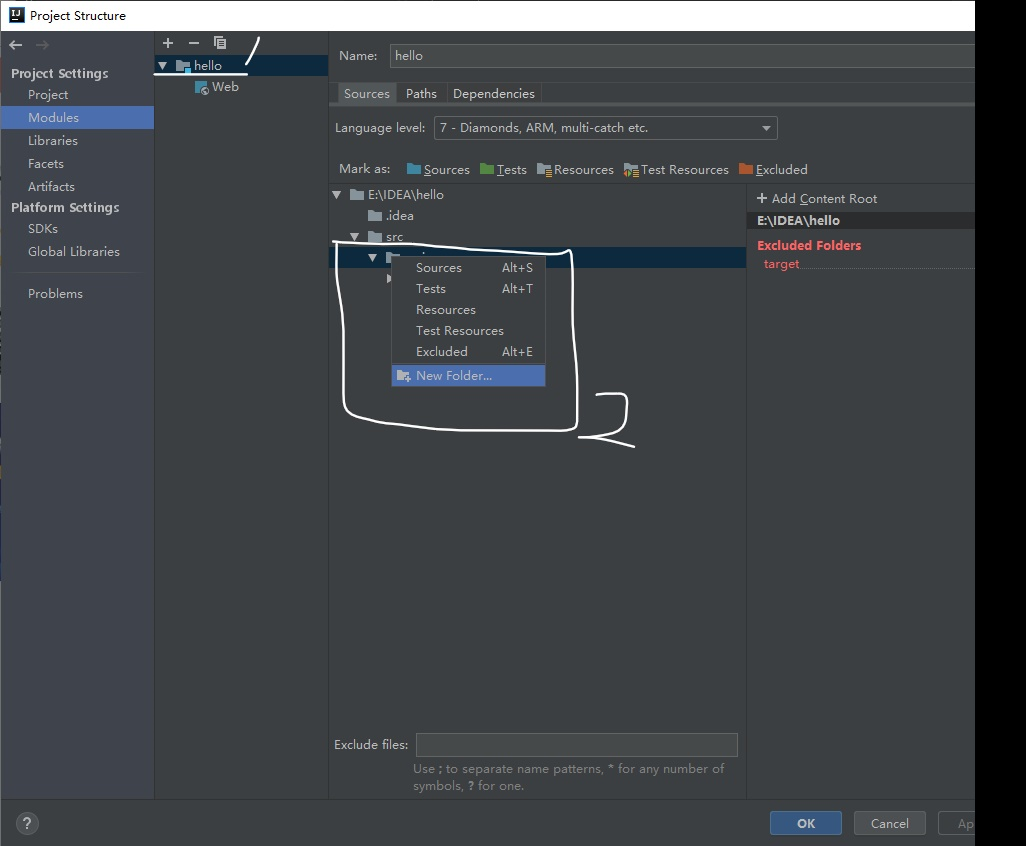
选中java文件夹,点击上面的Make as:Sources,该文件夹就会变成蓝色,用以保存java代码,按OK,结束配置。
在左边小树林java右击选择 New -> java clas,来新建myservlet类。

1
2
3
4
5
6
7
8
9
10
11
12
13
14
15
16
17
18
19
20
21
22
23
24
25
26
27
28
29
30
| import java.io.*;
import javax.servlet.*;
import javax.servlet.http.*;
public class myservlet extends HttpServlet {
private String message;
public void init() throws ServletException
{
message = "Hello World Java Servlet.";
}
public void doGet(HttpServletRequest request,
HttpServletResponse response)
throws ServletException, IOException
{
response.setContentType("text/html");
PrintWriter out = response.getWriter();
out.println("<h1>" + message + "</h1>");
}
public void destroy()
{
}
}
|
tomcat配置
配置tomcat
打开IDEA菜单Run -> 选择Edit Configuration 也可以点击右上方的往下的三角旁边的白框框选择Edit Configuration
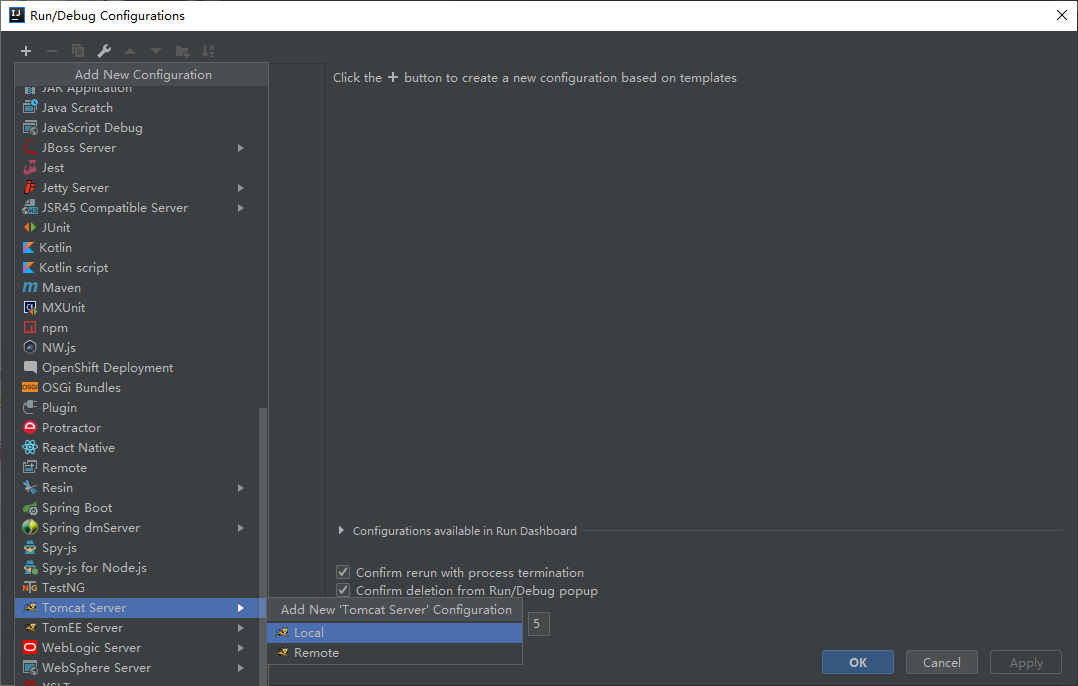
点击“+”号 -> 选择“Tomcat Server” --> 选择“Local”,如若没有tomcat server,请点击最下面的more item…
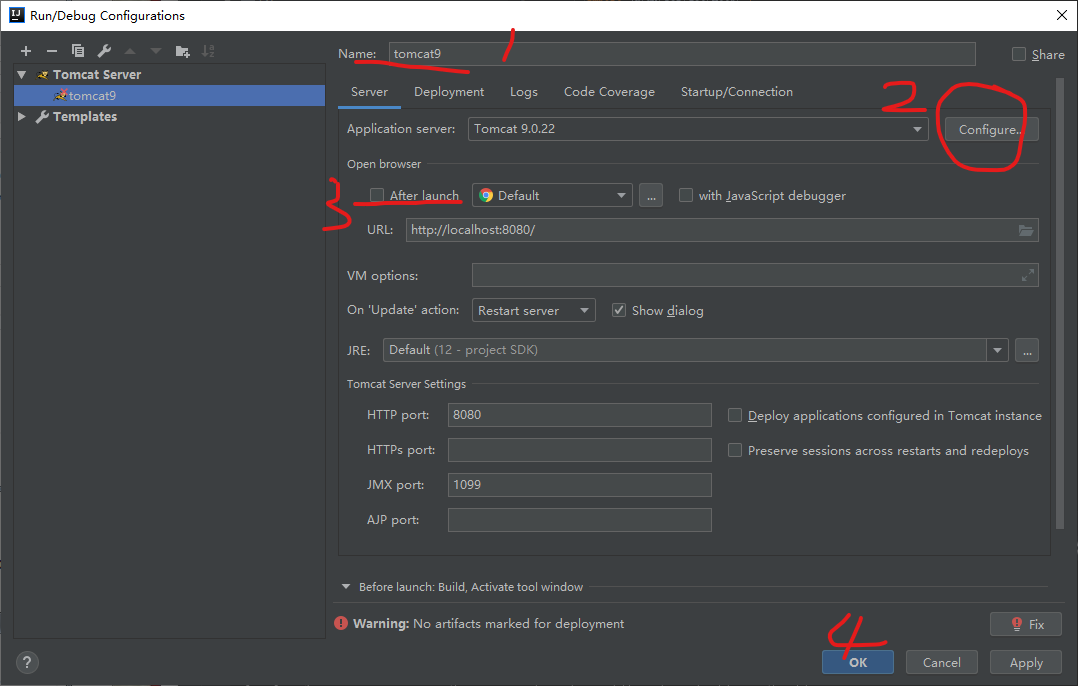
配置如下:
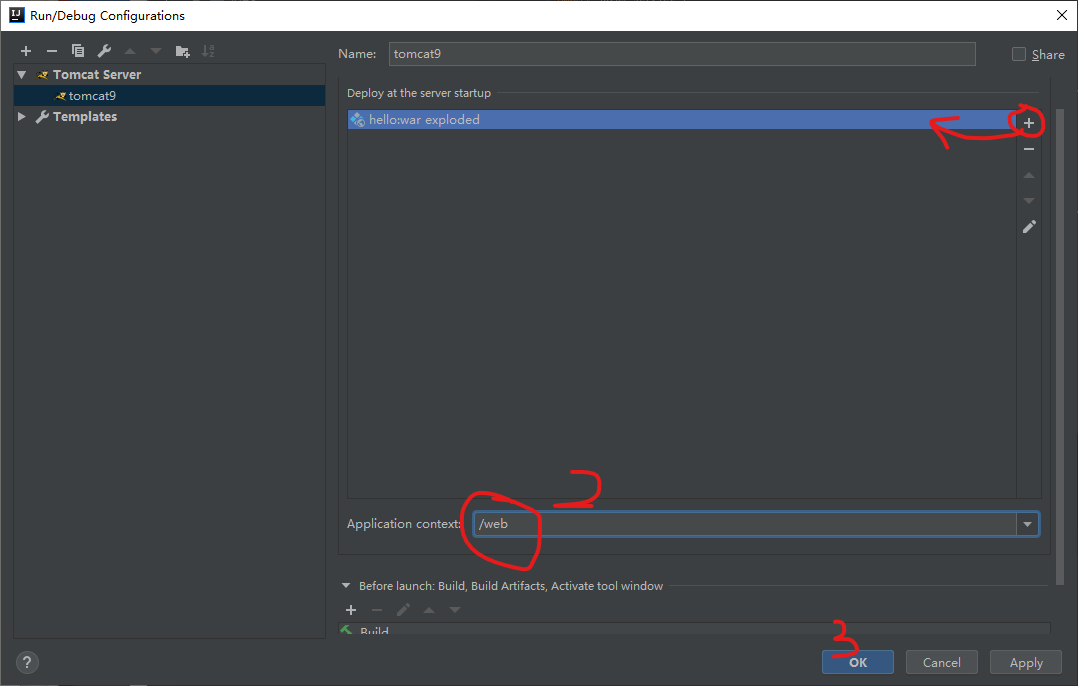
部署tomcat
打开IDEA菜单Run -> 选择Edit Configuration 也可以点击右上方的往下的三角旁边的白框框选择Edit Configuration -> 选择刚刚建立的Tomcat容器 -> 选择Deployment -> 点击右边的“+”号 -> 选择Artifact–>选择web项目–>Application contex填一个名字–>ok.
编辑index.jsp文件,修改h2内容为:
1
| <h2>Hello World! this is index.jsp</h2>
|
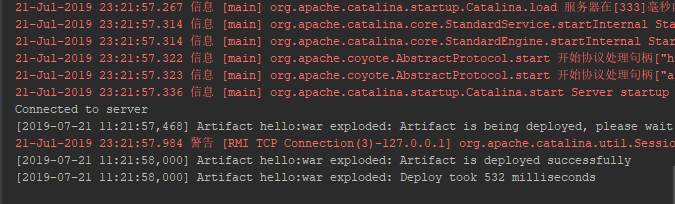
单机下面的tomcat启动按钮,在浏览器打开http://localhost:8080/web/,就能看到,浏览器成功显示h2的内容Hello World! this is index.jsp。
现在怎么运行我们想要的servlet呢?请继续看下去吧,壮士。
如果你遵循此文章,已经写完了java类mtservlet.java.请继续以下步骤,如未完成,请跳回。
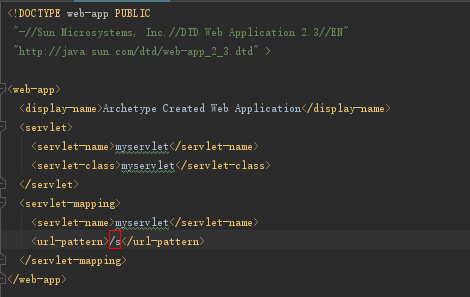
修改WEB-INF/web.xml文件。html代码可能显示不全,最好比对图片。
1
2
3
4
5
6
7
8
9
10
11
12
13
14
15
16
| <!DOCTYPE web-app PUBLIC
"-//Sun Microsystems, Inc.//DTD Web Application 2.3//EN"
"http://java.sun.com/dtd/web-app_2_3.dtd" >
<web-app>
<display-name>Archetype Created Web Application</display-name>
<servlet>
<servlet-name>myservlet</servlet-name>
<servlet-class>myservlet</servlet-class>
</servlet>
<servlet-mapping>
<servlet-name>myservlet</servlet-name>
<url-pattern>/s</url-pattern>
</servlet-mapping>
</web-app>
|
在下面tomcat控制台选择update -> Redeploy -> ok 后。打开浏览器http://localhost:8080/web/s。
就可以看到servlet控制的html内容了。
 Ok 壮士,this is done。
退出时,别忘了关闭tomcat服务器。# 问题解决
java版本错误
如若出现以下错误或警告。

可以修改pom.xml文件,在节点Project -> Properties下添加以下内容。注12为java版本号,填写自己的jdk版本号。
1
2
3
4
5
| <properties>
<project.build.sourceEncoding>UTF-8</project.build.sourceEncoding>
<maven.compiler.source>12</maven.compiler.source>
<maven.compiler.target>12</maven.compiler.target>
</properties>
|
tomcat控制台日志乱码
找到安装IDEA的bin目录将idea.exe.vmoptions和idea64.exe.vmoptions两个文件打开分别在文件最末尾添加-Dfile.encoding=UTF-8。